Deploying from Visual Studio
The following prerequisites are required in order to successfully build and deploy DASH:
- Visual Studio 2013 (Update 5 or greater) - http://www.microsoft.com/en-us/download/details.aspx?id=48129
- Azure SDK 2.4 (cannot be greater as 2.5 introduces a breaking change) - http://www.microsoft.com/en-us/download/details.aspx?id=43709
- Typescript 1.7 or greater - http://www.microsoft.com/en-us/download/details.aspx?id=48739
- Open Visual Studio 2013
- Open the Team Explorer window
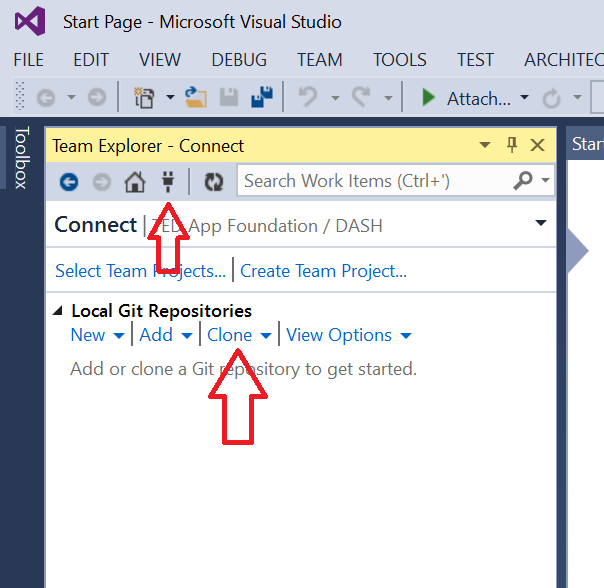
- Click the 'Connect' button
- In the 'Local Git Repositories' section, click the 'Clone' link:
- Specify the GitHub clone URI: https://github.com/MicrosoftDX/Dash.git as well as a new or empty local directory to clone the repository to:

- Once the Dash repository has been fully cloned, double-click the 'Dash' link. Then, double-click the 'DataAtScaleHub.sln' link to open the solution in Visual Studio
- Ensure that all projects in the solution open successfully (missing or incorrectly installed prerequisites for Azure SDK 2.4 or Typescript 1.7 are common reasons why the projects do not open successfully.
Note that this section is optional prior to deployment. The Dash Management Portal can be used after deployment to both provision and configure the required storage accounts.
- Open the Server Explorer window in Visual Studio
- Connect to your Azure subscription
- Open the 'Azure' item to reveal the 'Storage' section:

- Right-click the 'Storage' item and select 'Create Storage Account...' from the context menu
- In the 'Create Storage Account' dialog box, select the subscription to create the account in (this does not necessarily have to be in the same subscription as where the Dash service will reside, but general practice places both the service and storage accounts in the same subscription). Enter an unique name for the storage account. Make sure the region selected matches the region where the Dash service will be deployed - co-locating data and service provides maximal performance). Select the desired storage replication model (generally, 'Locally Redundant' works best for very large scale workloads, but other replication models will work successfully with Dash). Click the 'Create' button to create the storage account
- Repeat steps 4-5 for 1 namespace account, 1 diagnostics account and however many data accounts (up to a maximum of 16) are required for Dash
- Once all accounts have been created, select each created account in the tree, right-click and select 'Properties' from the context menu. In the Properties window select the 'Connection String' attribute. Click the ellipsis button to display the 'Storage Account Connection String' dialog box:

- Select the desired 'Primary' or 'Secondary' key and then click the 'Copy' button adjacent to the 'Connection String' field to copy the complete connection string to the clipboard
- Paste the connection string to a location where you may reference it later (eg. Notepad)
- Repeat steps 7-9 for every account you expect to be included in the Dash deployment
- Ensure that the entire solution builds correctly by selecting Build -> Build Solution from the VS menu. Address any of the reported build errors - normally due to missing or incorrectly installed prerequisites
- Select the Azure Cloud Service project that you wish to deploy. There are 2 options:
- Only a HTTP endpoint - associated project is DashServer.Azure
- HTTP + HTTPS endpoints - associated project is DashServer.Azure.Https
- Double-click the 'DashServer' role to open the Azure Cloud Service Properties window
- Select the 'Configuration' section:
- Enter the desired number of virtual machine instances to be deployed. A rough guide is that each instance can support ~2500 requests/second. It is strongly recommended to deploy at least 2 instances for reliability.
- The default VM Size is 'Standard_D3' (which may not be listed in the drop-down). We have performed extensive testing to conclude that this is the best VM SKU for Dash. However, if you wish to change the VM Size select from an available option in the list.
- Paste the Azure Storage connection string to be used for diagnostic information (IIS Logs, Trace Logs, Performance Counters, etc.) into the text field under 'Enable Diagnostics'
- Select the 'Settings' section:
- The
Tenant,ClientIdandAppKeysetting values are required for securing the Management API authentication as described in Configure Authentication for Management API - The remaining settings are described in the
Configurationdata structure in Dash Management API. This can include connection strings to Azure Storage accounts that were previously provisioned as per the above section, pasting the accumulated connection strings as appropriate
- (HTTPS Only) Select the 'Certificates' section:
- Click the ellipsis button in the 'TlsCertificate' row to open a dialog box to select the certificate that will be used to verify all SSL connections to the HTTPS endpoint. Note that this certificate must be issued by a trusted certificate authority for a custom domain that you own. You will also need a DNS CNAME entry to map the custom domain name to the standard Azure Cloud Service DNS name (eg. mydashservice*.cloudapp.net*):

- Once the desired certificate has been selected, its SHA-1 thumbprint will be displayed in the properties window
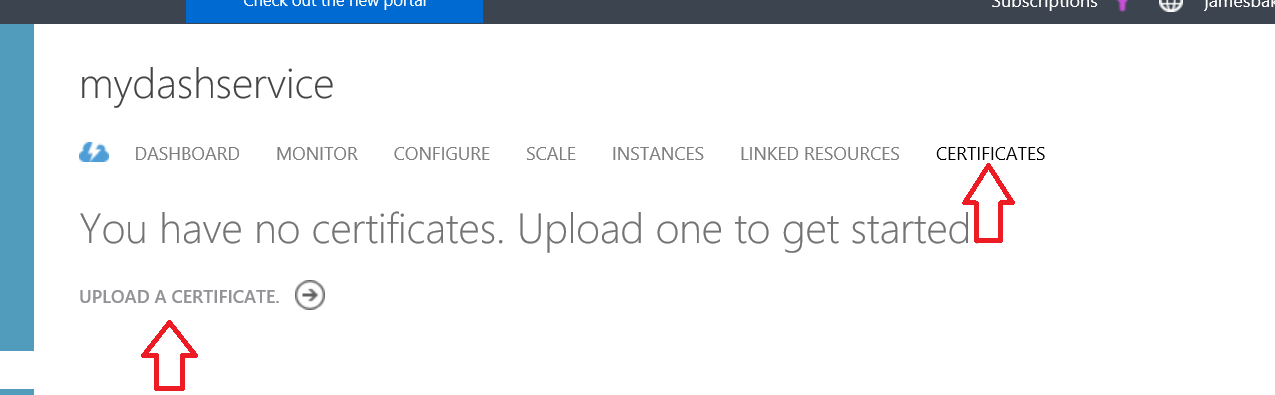
- (HTTPS Only) Use a web browser to navigate to the Old Azure Management Portal https://manage.windowsazure.com. Create a new Cloud Service for Dash with no associated deployment. Upload the SSL certificate that you have obtained from a trusted Certificate Authority (in pfx format). Note that it is important that the uploaded certificate is the same one selected above in the Dash configuration. Any mismatch will result in a failure to deploy.
- Right-click the cloud service project in the Solution Explorer window. Select 'Publish...' from the context menu.
- Sign in and select the subscription you wish to deploy Dash into. Click the 'Next' button.
- Either select an existing Cloud Service or select the option to create a new Cloud Service:

- Select the following settings and click the 'Next' button:
- Environment: Production
- Build Configuration: Release
- Service Configuration: Publish (PublishHttps for HTTPS endpoint service)
- Click the 'Publish' button. Visual Studio will build the specified configuration and then deploy the built package to Azure. Once the deployment is completed, the Dash service will be available for any client application to send Azure Storage requests to. Additionally, the Management Portal will be available on port 8080.