User Manual
- Register
- Entities
- Create an Entity
- Add Conection to the Profile
- Search for an Entity within the Administrator
- Manage the Front Page
- Create Cases
- Manage Sources
- Managing Sources in Document Cloud
- Suggestions
##Register
To enter to the Poderopedia management platform you must first register.
On the right side of the website you will find the LOGIN menu where you will see the options Register, Lost Password and Login (Fig 01)

##Entities
To begin adding content to your own Poderopedia, you must first create an ENTITY. The ENTITIES in Poderopedia are: PERSON, COMPANY, CASES, and ORGANIZATION. (Fig. 02)

##Create an Entity
For purposes of this manual we will use as an example the creation of a “PERSON” entity. COMPANIES and ORGANIZATIONS entities operate in the same way.
-
Go to “Create” in the menu, select the entity you want to enter. (Fig. 03). In our example we will enter a PERSON entity. (Fig. 03)

-
This will display a grid with the previously added ENTITIES (Fig 04). If you have not added any ENTITY, you will only see the button.

(Fig. 04)

These are the elements that the grid contains (Fig. 04)
Add ENTITY FORM
ENTITY search box

Show CONECTIONS

Preview ENTITY FORM

Edit ENTITY FORM

Delete ENTITY FORM

-
To add a new ENTITY FORM you should use the following button:
(Fig.05)

-
It will display the Person entity Form, where you can enter the Basic Profile Information (Fig. 06) , Summary (Fig. 08), Long Profile (Fig. 0 9), Sources (Fig. 10), “Document Cloud” Sources (Fig. 12a), if he is deceased or not (Step 6) and the Social Network (Step 7).
4.1. Basic data (Fig. 06)

You must enter the required Basic Information (Fig. 07). The required fields are Name, Surname, Short Name and Country. All the other fields are optional. The Date of Birth should be written in the DD/MM/YYYY format, the Home Country should be picked from the Menu, the Sector should be picked from the Menu, and the profile picture should be 140 x 140 Pixels (JPG or PNG formats).
(Fig. 07)
Example: We will add the data from the PERSON entity “Mónica Ventura Alcaíno”

4.2 We enter her Review (Summary Profile) (Fig. 08) and the Long Profile (Fig. 09), which contains a rich text editor where you can put links, bold, subtitle, etc. . . .
(Fig. 08)

(Fig.09)

4.3 Add one or more Sources (Fig. 10). To add a Source you must click on the button

Use of the source tool

To use the source tool, simply click on the button to see a list of available sources. There, you can check any sources you want to include, and search for sources in the search box.

4.3.1. It will display the Source Form (Fig. 11) (It only allows Sources form websites). Then you have to enter the required data. The date is entered in format DD/MM/YYYY.
(Fig. 11)

4.3.2. The Source Form will close itself when you save it. The Source will be added to the alphabetically ordered list. (Fig. 12). You will have to choose it then. To choose more than one Source, you can pick them by keeping pressed the CTRL button on your keyboard and clicking the Title of the Sources you want.
(Fig. 12)

-
Use of the Document tool
Upload PDF Document associated with Document Cloud (Fig. 12 a). You can upload PDF documents linked with the Document Cloud tool (www.documentcloud.org) from Poderopedia.
You can only upload them in the Poderopedia Admin interface, to modify documents you must do so directly from the Document Cloud tool.
5.1. To use the document tool; click the
button to see a list of documents available on Document Cloud. There, you can check all the documents you want to include, or search for documents in the search box.
5.2. To add a new Document to Document cloud click the
 button and fill the required data.
The Entry Form of a new PDF document will be displayed (Fig. 12 b) you must complete the required data. The required fields are File (Select File) and Document Title. You can set the Source of the Document (Example: World Bank), Document Description, Associated Document URL. Access option is mandatory (if you want to publish the document to all the public, you must choose the Public option, otherwise you must choose Private). Finally, you must choose a Project (mandatory). Poderopedia Chile has three Projects: People, Enterprises and Organizations, which we upload PDF documents related to each of them. You must create these projects from the Document Cloud tool.
(Fig. 12 b)

-
Is deceased. If the person is deceased you must check this option

-
Social Networks. Fill the form with the following data (optional)

-
Save the Profile Form with the Button

##Add Conection to the Profile
-
After saving the Entity Form that we created a grid will display (Fig. 13) with the details that we entered. However, we still have to add the Connections.
(Fig.13)

-
To add the Connections you must click the Add button
 (Fig. 14) first
(Fig. 14)
(Fig. 14) first
(Fig. 14)
-
The other connections will display (Fig. 15)
(Fig. 15)

-
To add a new connection you must click on the “Add Connection” link (Fig. 16). As an example we will enter a family connection.
(Fig. 16)

-
The Connection form will display (Fig. 17). For default will already have entered the Person Entity, the Relationship (the connection) and the other Person with whom you want to link your already created Entity. Besides the source(s) of your connection.
(Fig. 17)

-
Select connection. For our example we will select Father/Mother
(Fig. 18)

-
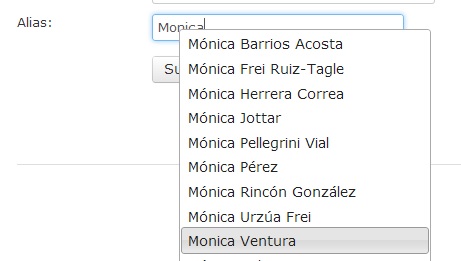
Now you must enter the connection with another person (Fig. 19).
If the Person entered already exists in the database, you must NOT add it again, the system will alert you about it and you only have to select it. If not, you can create a new person Entity just entering his SHORT NAME. DOING SO WILL CREATE A NEW PERSON ENTITY.
(Fig. 19)

-
Add the source for the connection (Fig. 20). Press the button
Use of the source tool
To use the source tool, simply click on the
button to see a list of available sources. There, you can check any sources you want to include, and search for sources in the search box.(Fig. 20)
8.1. The Source Form will open. (Fig. 21). The following fields must be completed:
DESCRIPTION (Title of the source), URL (Web address of your source), DATE (DD/MM/YYYY). After completing the data, save them with the button
(Fig. 21)

-
Save the connection with the button
-
When saving, the system will alert the new connection. In our example, it will say “Father Inside”. (Fig.22)
(Fig.22)

- To add a new connection, use the button
 (Fig.23)
(Fig.23)

- You will return to the Entity Grid (Fig.24) to continue adding Connections.
(Fig.24)

- To enter a new connection. Click on the button (Fig. 25) connections will be displayed to continue adding all the connections you need.
(Fig. 25)
- Other connections will be displayed (Fig. 26) to continue adding all you need. For example: SPOUSE
(Fig. 26)

##Search for an Entity within the Administrator
-
Search for Entity created
To look for an entity that we have already created. First you must click on the search box (Fig. 27)
(Fig. 27)

A menu with is displayed with the search criteria. (Fig. 28)
(Fig. 28)

Select search criteria (Fig, 28). We will select search by "Short Name" (Fig. 29). We will seek the Entity we created: "Monica Ventura"

Select New (Fig. 30)
(Fig. 30)

Write Short Name of the person you want to search inside the quotes of the code (Fig. 31) and click the Search button
(Fig. 31)

It will display the search result (Fig.32). In our example the Entity Person: Monica Ventura.
(Fig.32)
##Manage the Front Page
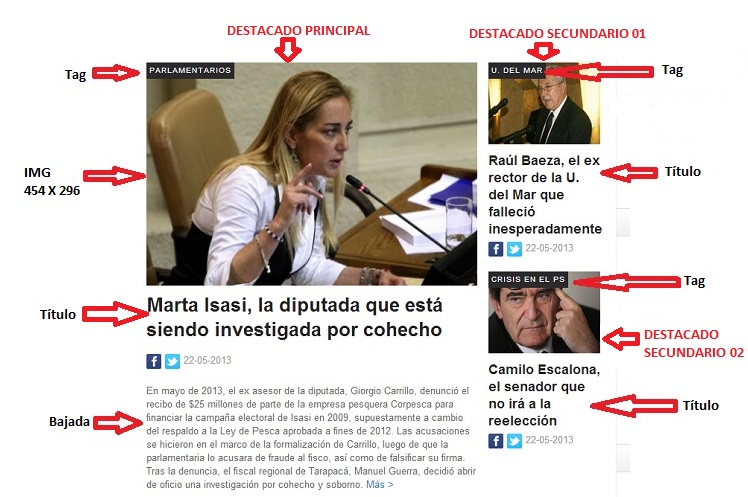
The front page of Poderopedia (Fig.33) consists of THREE FEATURED NEWS: A major and two minor. The featured news is ordered according to the time of entry. The main featured new will be the last entered. If you add another new, the main featured new will pass to be the second featured new.
(Fig.33)
-
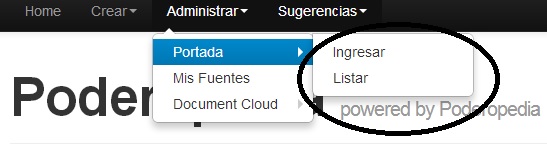
To manage the front page of Poderopedia you must enter the Administration Menu and Select Manage Home. The Home menu is displayed with the following options: Login (a new top cover) and List (to edit an already entered new) (Fig. 34)
(Fig. 34)
-
To add a new featured new to the front page you have to select the option 'add' (Fig. 35).
(Fig. 35)

-
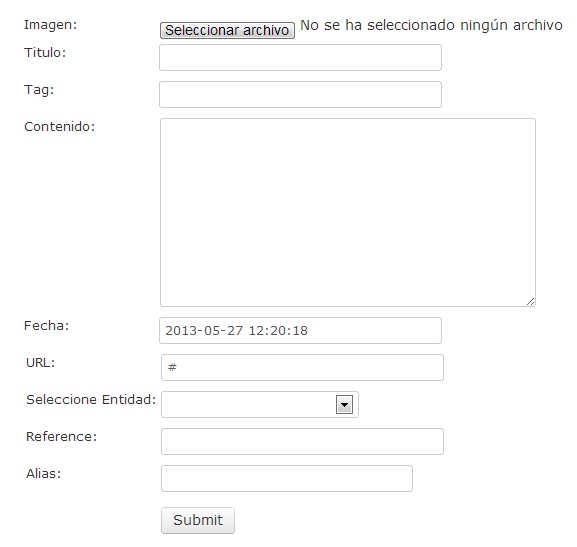
The Featured new form will be displayed. Complete the form (like in number 4). (Fig. 36).
(Fig. 36)
-
You will have to fill the form of Fig. 36 the following way:
FrontPage Picture size: 454 x 296 Pixels. File Format JPG or PNG

Front page head title

Tag

Content

Date and time

URL. Automatic filled field

Choose an Entity. You can choose Person, Company or Organization

Reference. Automatic filled field

Alias. Short name or alias of the Entity chooses.
Submit
-
Edit the featured cover story. To edit the featured cover story you have to go to Menu Manage, select Home and then List. (Fig. 37).
(Fig. 37)

-
A grid will be displayed (Fig. 38) containing the list of featured news. There, you will be able to:
View
 , Edit
  or delete
  .
.**(Fig. 38) **

##Create Cases
Poderopedia, besides creating People profiles, Business profiles and Organizations profiles, allows the creation of articles. We will call these articles cases.
-
To create a case you have to go to the Create menu (Fig. 39) and select the Create Case.
(Fig. 39)

-
A new page will be displayed (Fig. 40). With the add button
, you will be able to create a new case. In the grid will appear the Cases that have already entered, where you can: View , Edit or Delete (Fig. 40)

-
When creating a new case the required form will be displayed (Fig. 41). You have to complete the required information and Save (Submit):
(Fig. 41)

##Manage Sources
You can manage the already added Sources (Edit, Delete or Search).
-
Go to manage menu (Fig. 42), select My Sources
(Fig. 42)

-
The Sources grid will be displayed (Fig. 43). There you can:
Create a new source, View
, Edit , Delete , or search (See step 3).(Fig. 43)

-
Search for a source 3.1. We will look for a SOURCE we have already created. First you must click on the search box (Fig. 44)
(Fig. 44)
3.2. A menu with search criteria is displayed (Fig. 45)
(Fig. 45)

3.3. Select search criteria of the document
We will select search by "Description." Then click the New button (Fig. 46)
(Fig. 46)

3.4. Inside the search box the following code will appear: document.name = "" (Fig. 47)
(Fig. 47)

3.5. Write the name of the document you want to search for inside the quotes of the code and click Search (Fig. 48)
(Fig. 48)

##Managing Sources in Document Cloud
You can upload PDF documents linked with Document Cloud tool (www.documentcloud.org) from Poderopedia. From the Poderopedia administrator you can only upload, to make annotations on the document you have to do it directly from the Document Cloud tool.
-
To upload a PDF document you must go to the Manage menu (Fig. 49), select Document Cloud and then Enter:
(Fig. 49)

-
The form will be displayed to enter a new PDF document (Fig. 50). You have to complete the required data. File (Select File) and Document Title are required. You can set the Paper Source (Ex World Bank), Description of Document or the Associated Document URL. Access option is mandatory (if you want the document be displayed to the public, select this option, otherwise you have to select the Private option). Finally you have to select a Project (mandatory). Poderopedia Chile has three projects: People, Enterprises (or Businesses) and Organizations. Here, we upload PDF documents related to each of them. You have to create these projects from the Document Cloud Tools.
(Fig. 50)
##Suggestions
From the Poderopedia administrator you can manage suggestions or user collaborations:
-
To manage the suggestions you have to go to the Suggestion Menu (Fig. 51) and select one of the following options: Connections, I have Data, Suggest Person, Error or Inappropriate Content
(Fig. 51)

-
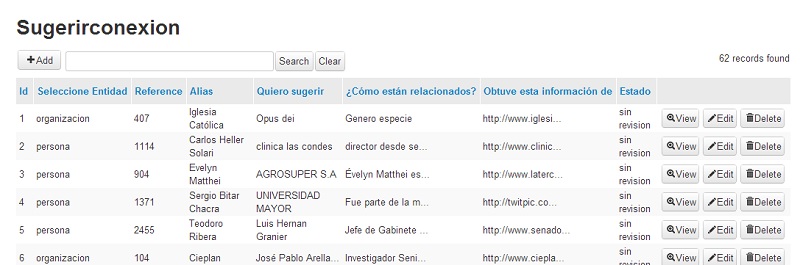
Selecting one of them will display a grid (Fig. 52) where you can: View
, Edit , Delete , or search for a collaboration with the appropriate criteria.(Fig. 52)
-
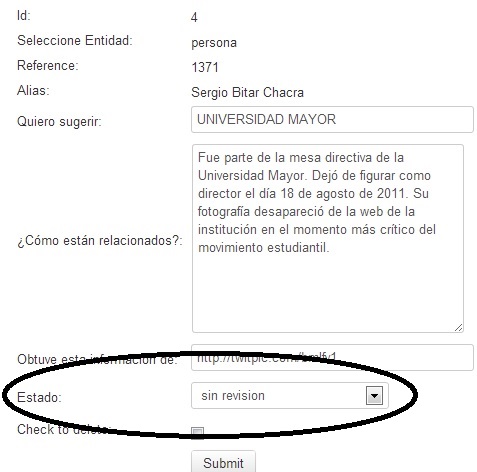
In the Edit (
) option you can see the suggestion sent by a user and assign a state to it (Fig. 53). The states are: Without revision, rejected and Accepted/on course / Assigned.(Fig. 53)