-
Notifications
You must be signed in to change notification settings - Fork 15
Payload Modules
The main purpose of Wiregost, at this time, (and given its mostly a merge of Sliver and Merlin C2s) is to be an implant framework. Therefore, the core functionality of Wiregost is supplied through its Payload modules.
At their core, payload modules are merely stubs for:
- implant generation
- listener spawning
However, some ancillary commands are available to these modules, for using implant profiles between others.
To use a payload module:

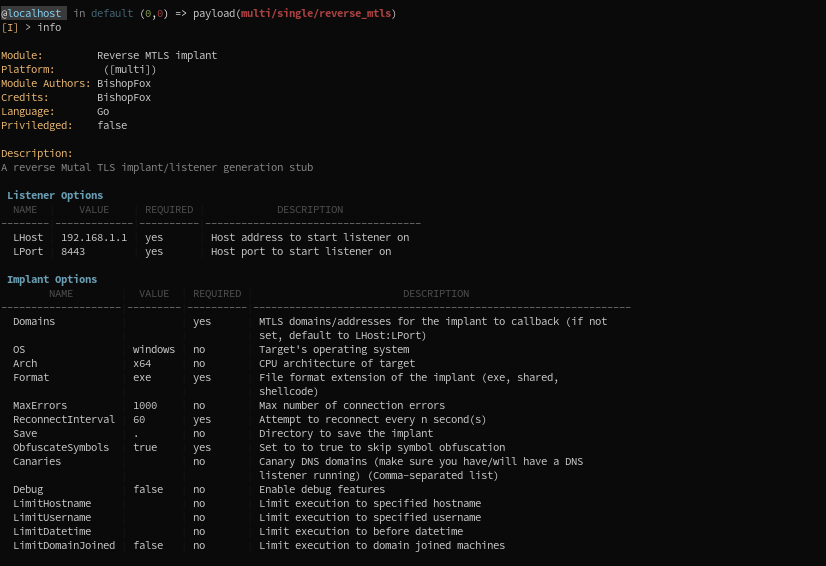
Now, we will look at the available options, and what is their structure and role.

In this case:
- The module has a multi-architecture capacity, because it is written in Go.
- The module allows you to compile implants using encrypted TCP (Mutual TLS) as C2 communication.
- It also allows you to spawn a MTLS listener.
As you may have/will notice, payload types are determined by the underlying C2 protocol used by the implant.
Options, in payload modules, are separated in two categories:
- Listener options
- Implant options
This way, you can quickly prepare an implant and his associated listener, and spawn/compile both in a short time.
Each payload modules targets either one specific C2 protocol, or multiple ones. Depending on the C2 protocol available, listener options may differ: HTTP(S) listeners, for instance, will support website static content, Let's Encrypt options, etc... The same goes for DNS listeners. Go check the documentation for specific payload modules to see these options.
Implant options will influence the implant compilation process. For instance:
- Domains: In the example above, the host:port combination (or a comma-separated list of them) that the implant will try to reach when being ran.
- OS: Specify the OS of the target on which the implant will run.
- Arch: The CPU architecture of the target.
- ObfuscateSymbols: if set to true (default), the implant will be obfuscated at compile-time.
- DNS Canaries: A comma-separated list of domains that will act as Canaries. (Check DNS Canaries)
Besides, and depending on the payload type, implant options will slightly vary. Refer to payload-specific documentation to know them.
You can set Canary Domains with the option Canaries. When compiled, the Canaries will be saved and accessible with the
canaries command.
You can provide a comma-separated list of Canary domains as option.
As said in Profiles, profiles are saved implant configurations.
After we set a few options in the module above (like DomainsMTLS, OS to Darwin, Debug to True, etc), we generate a profile. You can generate a profile from the current module like this:

We now see a new profile, with different settings, in our profile list:

You can parse ANY implant profile into ANY payload module: The module will only pick the options from the config that are relevant to him.
An example, in the continuity of the example above. Note that:
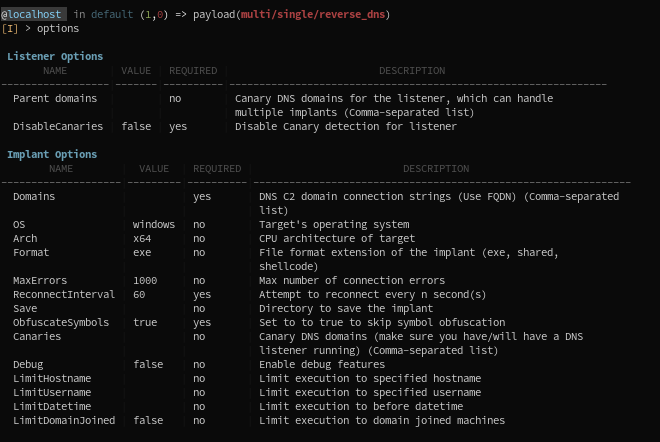
- We have switched to a DNS Payload module (the implant communicates over DNS).
- As you can see below, most options are common to both modules, but implant Domains and Listener options are different.
- Some options, like
OSandArch, are set toWindowsandamd64, and the format is set toexe(EXECUTABLE)

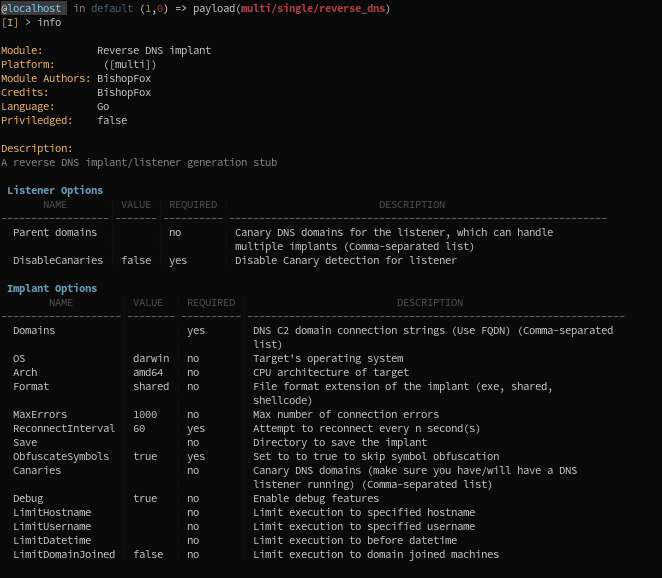
We then parse the MTLS profile made before (profile names are auto-completed):

Notice how the module has parsed only the options that are relevant to him, like OS, Arch, Format, but not Domains (that are MTLS in the profile):

You can now set the options specific to the DNS payload/implant, and generate it.
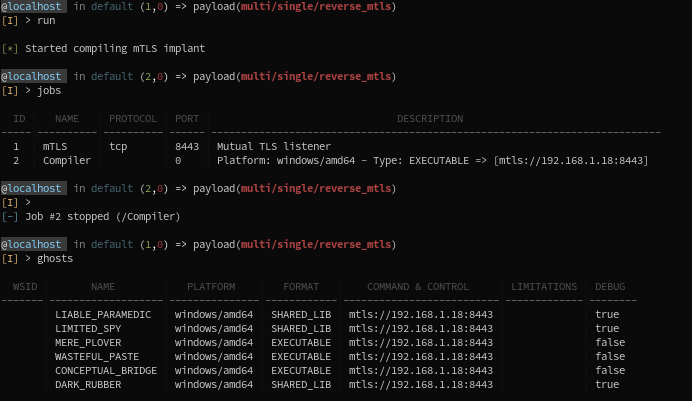
With options set , you can now generate the implant. (Only one required option is not set by default: Domains to callback, so generating with it not being set will fail). This is done by the C2 Server as a background job. The picture below shows you the 3-step process:
- Generating an obfuscated implant (sending the request to the C2 Server) with the
runcommand - Seeing the compiler working as a background job (taking some minutes, because obfuscation is longer)
- Waiting for the Server to notify it is done compiling
- Seeing the newly generated implant in our list of ghosts (the name is
MERE_PLOVER).

We can now set our Listener Options, with the same LHost and LPort than the ones used for the implant. We then run the listener:

You now just have to execute your implant, and your session will pop !