Note: This is a fork of masato-ka's repo. We noticed it was a bit out of date, so this is an updated version. Also, we have only written it to be used with the JetBot. The JetRacer will require modifications to get it to work. Here is the original repo link: https://github.com/masato-ka/airc-rl-agent
Overview
This project allows your AI Robocar to drive on a road using Deep Reinforcement Learning.

We have updated these instructions to work with the Jetbot.
Many DIY self driving cars like JetBot / JetRacer and DonkeyCar are using behavior cloning by supervised-learning. The method needs a large amount of labeled data that must be collected by a human.
In this project, we are using Deep Reinforcement Learning (DRL). That is, the robot can learn the proper driving behavior automatically through giving rewards when interacting with the environment. It does not require sampling and labeling data.
In addition, this can run on the Jetson Nano - and is relatively efficient at doing so. How? Well, the Jetson Nano allows this to integrate with Soft Actor Critic (SAC) and VAE. SAC is the state-of-the-art off-policy reinforcement learning method.
-
This method was devised from Antonin RAFFIN's work
-
Detail of SAC can be found here:
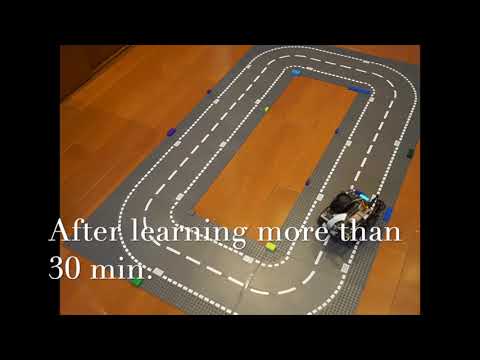
This demo video shows that the JetBot can learn how to drive on the road in under 30 minutes using only Jetson Nano.
- Jetbot
- MicroSD card with at least 128GB available
- JetPack>=4.2
- Python=>3.6
- pip>=19.3.1
- pytorch>=1.8.0
- Windows, macOS or Ubuntu (DonkeySim only)
- x86-64 arch
- Python>=3.6
- pip>=19.3.1
- DonkeySIM
- Optional CUDA10.1(Windows and using GPU.)
- pytorch>=1.8.0
Set up JetBot using the following SDCard image. [https://jetbot.org/v0.4.3/software_setup/sd_card.html]
Begin by setting up LearningRacer using the Docker container image. You will first need to SSH into your jetbot. You can do this directly in Jupyter Notebooks by doing the following:
$ ssh jetbot@localhost
This allows you to run commands as if you're not logged in as the jetbot user. You can always plug a monitor and a keyboard directly into your Jetbot instead. Next, clone the repo:
$ cd ~/ && git clone https://github.com/cmroboticsacademy/airc-rl-agent
$ cd airc-rl-agent/docker/jetbot && sh build.sh
$ sh enable.sh /home/jetbot

$ sudo docker update --restart=no jetbot_jupyter
$ sudo reboot
Once you run these commands, your jetbot will be rebooted.
JetBot images(JetPack>=4.4) are using a docker container. Therefore, you must build the application on the docker container.
You can use the racer command inside the docker container. Access it by going to the Jupyter Notebook on the
container[http://:8888/] and launch terminal(File->new->terminal).
Sometimes Pytorch can not recognize your GPU which may be a CUDA Driver issue. For this, you need to install pytorch following this link. Details can be found here: this
When you've finished the above, you can confirm your install by running the following command.
$ racer --version
learning_racer version 1.5.0.
** Note that your version might be different
- Collect 1k to 10k images from your car camera using
data_collection.ipynbordata_collection_without_gamepad.ipynblocalted inairc-rl-agent/notebooks/utility/jetbot. - Create your VAE using
VAE_CNN.ipynblocated inairc-rl-agent/notebooks/colabo. It is going to create a vae.torch file in this directory.
A.Offline check
NOTE: I (Vu) could not get this part to work. Skip if you want.
When you run VAE_CNN.ipynb, you can check the projection of the latent spaces on TensorBoard Projection Tab. These latent spaces are labeled by K-means. If similar images stick together, it indicates that they are good.

B.Online check
Run notebooks/util/jetbot_vae_viewer.ipynb and check the reconstruction image. Check that the image is reconstructed at several places on the course.
- Left is an actual image. Right is reconstruction image.
- Color bar is represented latent variable of VAE(z=32 dim).

- Run
user_interface.ipynb(this one needs a gamepad). If you not have gamepad, useuser_interface_without_gamepad.ipynb - Go into a terminal on your Jetbot and run the following:
$ cd /airc-rl-agent/ && racer train -robot jetbot -vae notebooks/colabo/vae.torch
After few minutes, you will see the Toggle Button in user_interface_without_gamepad.ipynb (we only used the one without the gamepad) say that it is Valid, meaning that it's ready to start.
When you press Start, the robot will run. If it starts to veer off course, hit the button again to Stop. Wait until the word says "Valid" again with a checkmark before pressing Start again. Repeat this to train your robot on the course. Then, after `` `RESET``` is displayed at the prompt, press the START button. Repeat this.
| Can run | Waiting learning |
|---|---|
 |
 |
The terminal should look similar to this as you start and stop the robot.

- racer train command options
| Name | description | Default |
|---|---|---|
| -config(--config-path) | Specify the file path of config.yml. | config.yml |
| -vae(--vae-path) | Specify the file path of the trained VAE model. | vae.torch |
| -device(--device) | Specifies whether Pytorch uses CUDA. Set 'cuda' to use. Set 'cpu' when using CPU. | cuda |
| -robot(--robot-driver) | Specify the type of car to use. choose from jetbot, jetracer, jetbot-auto, jetracer-auto and sim. | JetBot |
| -steps(--time-steps) | Specify the maximum learning step for reinforcement learning. Modify the values according to the size and complexity of the course. | 5000 |
| -save_freq(--save_freq_episode) | ||
| Specify how many episodes to save the policy model. The policy starts saving after the gradient calculation starts. | 10 | |
| -s(--save) | Specify the path and file name to save the model file of the training result. | model |
| -l(--load-model) | Define pre-train model path. | - |
In -robot option, If you choose jetracer-auto or jetbot-auto, Auto train mode start. When this mode, Robot stop without human controll and pullback position where start learning.
When only inference, run below command, The script load VAE model and RL model and start running your car.
$ racer demo -robot jetbot- If you find bug or want new functions, please write an issue.
- If you fix things yourself, please send a pull request.
This software license under MIT licence.
Updated by Carnegie Mellon Robotics Academy (https://github.com/cmroboticsacademy)
Original Author: masato-ka