A fancy dog-based internet currency tipjar
- 1000 uF Capacitor (suggested 10V+)
- ESP32 Dev board - You can use any ESP32 board style, but the 3D printed case was designed for that particular style
- DFPlayer Mini
- SD Card for your DFPlayer
- Small speaker
- TFT Touch Screen - The one I used is using the ILI9341 for control and 320x240 resolution. You can use other styles if you want to edit the images & code.
- Wires
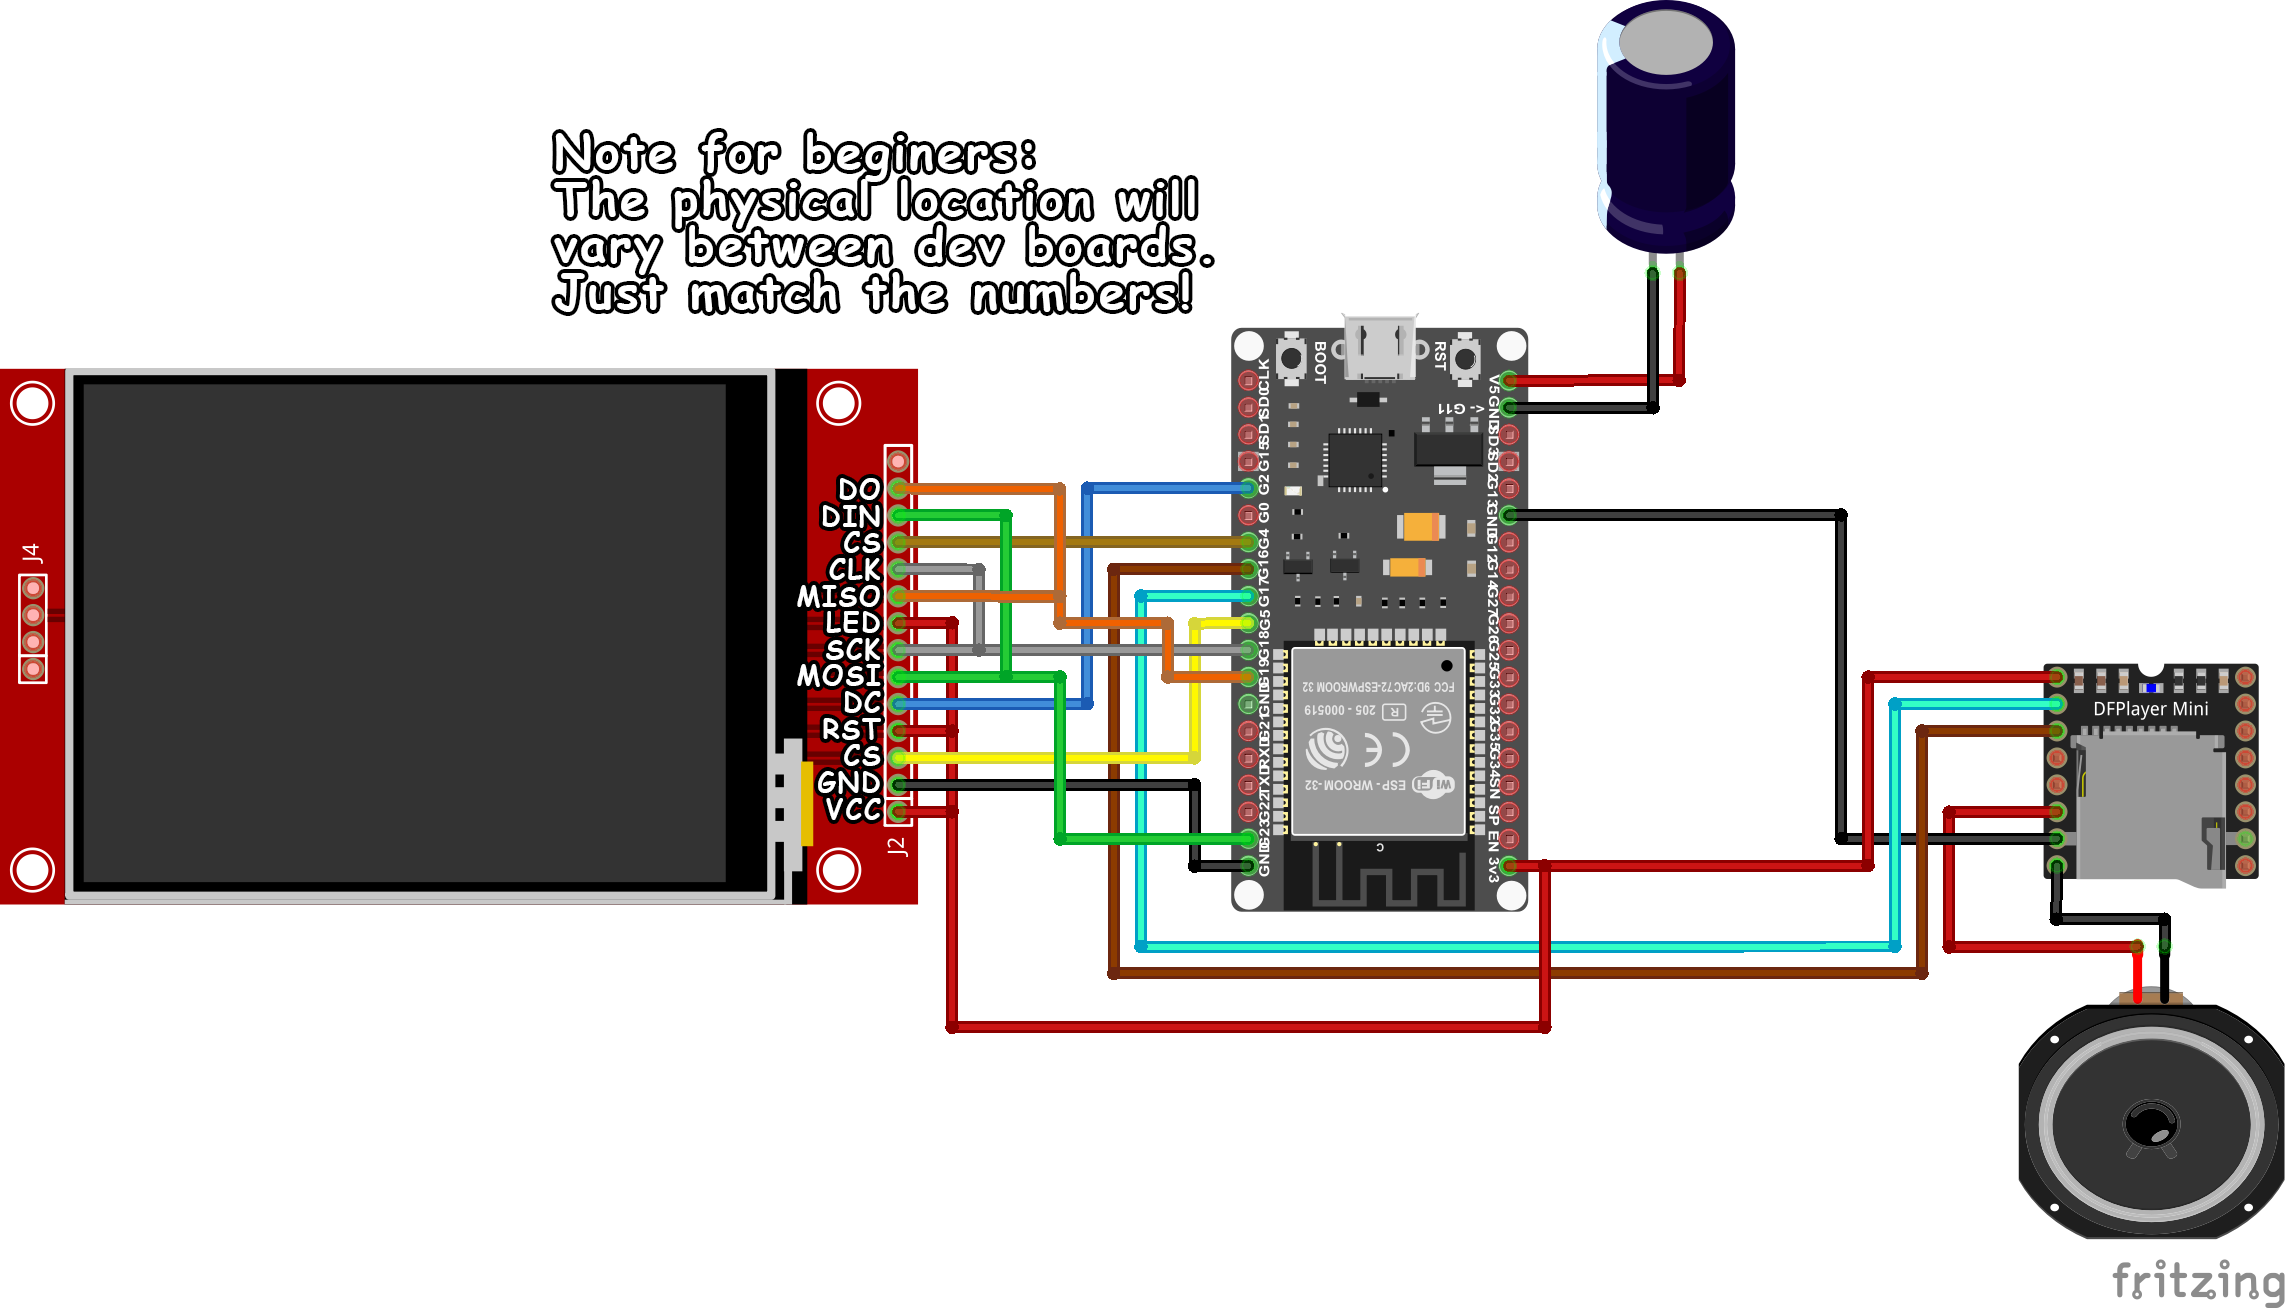
| Screen Pin(s) | ESP Pin | Note |
|---|---|---|
| VCC, LED, RST | 3v3 | Power supply |
| GND | gnd | ESP ground, all grounds are tied together |
| CS | IO5 | Chip select for screen |
| DC | IO2 | |
| SDI (MOSI), DIN (Touch) | 23 | SPI |
| SCK, CLK (Touch) | 18 | SPI Clock |
| MISO, DO | 19 | SPI |
| IRQ (touch) | Not connected | Can be used for interrupts |
| CS | 4 | Chip select for touch |
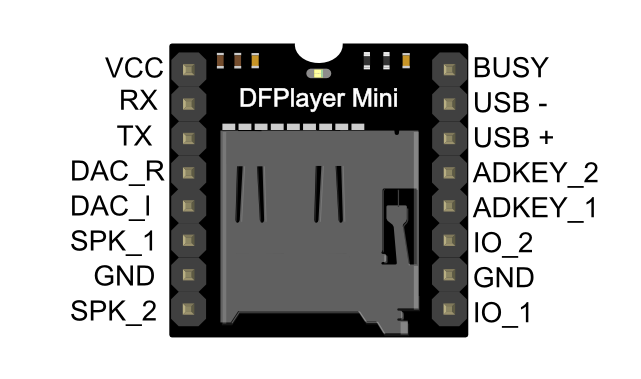
| Speaker Pin | ESP Pin | Note |
|---|---|---|
| 1 (VCC) | 3v3 | Power supply |
| 2 (RX) | 17 | UART |
| 3 (TX) | 16 | UART |
| 6 | Connect to speaker | Either pole on the speaker will work |
| 7 | GND | Connect to any ground, all grounds are tied together |
| 8 | Connecto to speaker | 6 and 8 should be connected to one pole each of the speaker |
Protip: On the bottom of the DFPlayer next to the 8-pin chip directly under the SD card is a 0-ohm resistor. If you remove that and short the unsoldered jumper on the right side of the chip, it'll draw much less current in standby.
Connect a 100-1000uF capacitor with the positive end (long leg) on 5V of the ESP32, and short leg on GND. This will help reduce screen flicker and brownouts on the DFPlayer.
- Install Arduino
- Install ESP32 board
- Install the ESP32 filesystem uploader
- Install the following libraries using the Arduino library manager:
- TFT_eSPI. This one needs you to edit a User_Setup.h library file for your board. There's an example User_Setup.h in the Templates folder setup for the ILI9341 screen that I use in this project. For more info see the library.
- QRCode
- ArduinoJson
- ArduinoWebsockets
- DFPlayerMini_Fast
- Set your board appropriately in Arduino. I use ESP32 Dev module, No OTA (2MB App/2MB FATFS)
- Open the TipJar.ino file in Arduino.
- Plug in your arduino to your computer and select the com port in the tools menu.
- Go to Tools -> ESP32 Sketch data upload. This should upload all the image files and font to your ESP32.
- Audio: Format your SD card to FAT32.
- Find the audio files in the Audio folder. The files need to be pasted in a specific order. Look at Instructions.txt in the Audio folder for the correct sequence.
- Plug the SD card into the DFPlayer.
- Compile and upload by hitting the Arrow button in Arduino.
The STL folder has the 3d prints. It's very simple and requires you to use hot glue to attach the screen. Feel free to make a better one!