Localino Ground Up Development
Localino upbringing is rather tedious, but the overview is the following:
- Connect the IRQ pin
- Flash the USB bootloader
- Set up the DW1000 arduino driver
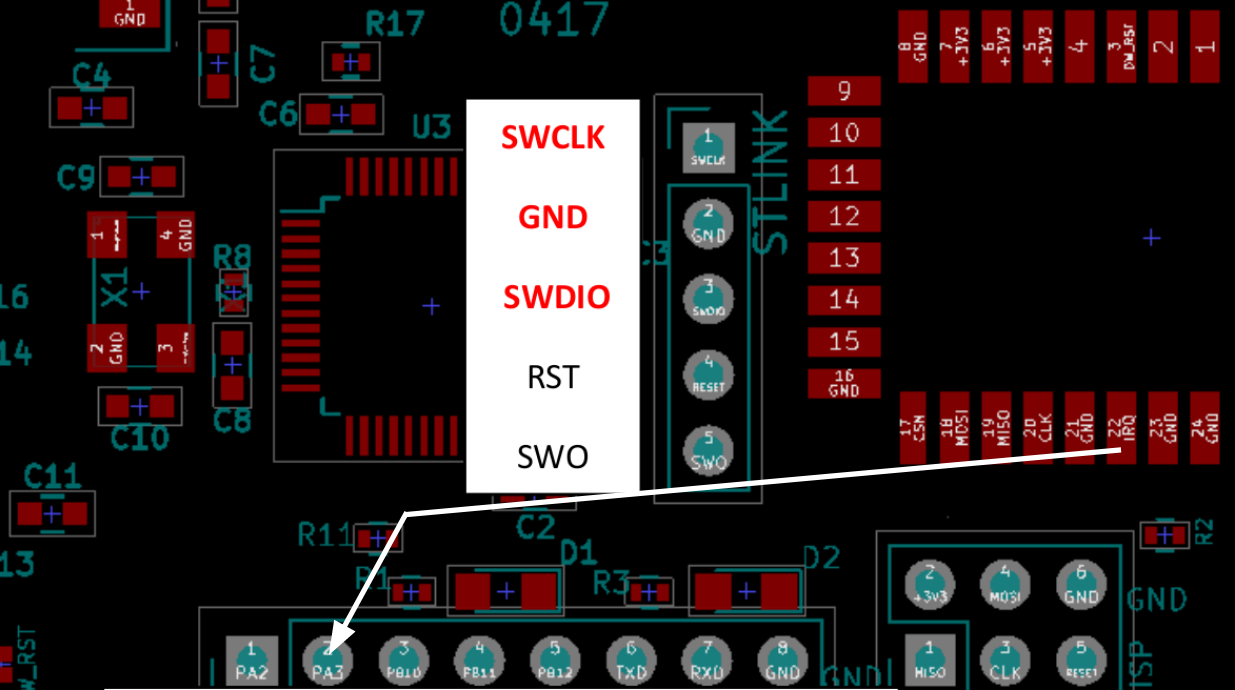
Referencing the following images, we see that PIN 22 is only connected to GND. This is problematic b/c we would like to utilize the IRQ signal in our firmware to indicate that a transmission has been sent or received.
 See the following image for the connection we need to make. Solder an external connection as such. This connects our IRQ pin to a pin on the STM32 that our firmware looks for.
We cannot by default use the uUSB port on the localino board to flash firmware for the STM32F103C. We are looking for the DFU bootloader. Follow this guide. Make sure to solder bridge BOOT0, solder bridge the two pads closer to the uUSB hub to create a 0 across BOOT0, this'll allow our python script to write the DFU to the right place in memory. Use generic_boot20_pb0.bin in roger's library for the dfu binary. See the following image and note the following connections:
- A9 - RXD
- A10 - TXD
- 3V3 - 3V3
- GND - GND
 Make sure to remove the solder bridge across BOOT0 before attempting to flash arduino firmware.
The firmware file that we will compile and flash onto the localino is located in arduino/localino/localino.ino . But for now we need to set up our Arduino environment to use the files in arduino/src when compiling localino.ino. Follow roger's instructions under your OS to set up the compiler. Flashing the localinos has only been tested on Windows. In the Arduino IDE, navigate to the Tools bar and set the upload configurations as follows:
- Board : Generic STM32F103C series
- Variant : STM32F103C8 (20k RAM, 64k Flash)
- Upload Method : STM32duino bootloader
- CPU Speed : 72MHz
Compile the code and hit the upload button. If the IDE cannot find the DFU device, power cycle the localino using the onboard switch. NOTE you can only flash firmware to the board while the LED on start up is blinking.
After setting up the compiler, follow the instructions under Installation. We have the master branch of arduino DW1000, but we're a little limited by this driver, so we've made some edits (peer-to-peer comm, multiple frequencies and channels...). We need to the dw1000 source code with our custom source code. In Windows Navigate to Arduino/libraries/arduino-dw1000/. Replace the src directory here with the src located in cohrint_jackal/localino/arduino/src.
Open localino.ino in the arduino IDE and check for compilation.