If you're really up for this then why not help us move to Gradle instead? :)
- Download ADT Bundle
http://developer.android.com/sdk/index.html Install in your /Applications folder if you're on OSX.
- Download the default Android SDK version 22.3
Go to Window > Android SDK Manager

Select "Android 4.2 (API 17) > SDK Platform"
(Optionally) install the System Image (ARM or x86) if you want to run the debugger or emulator.

Click on Install packages button.
Accept the licenses
Click Install
(Note that this will take a while)
Close the SDK Manager.
- Install eclipse packages
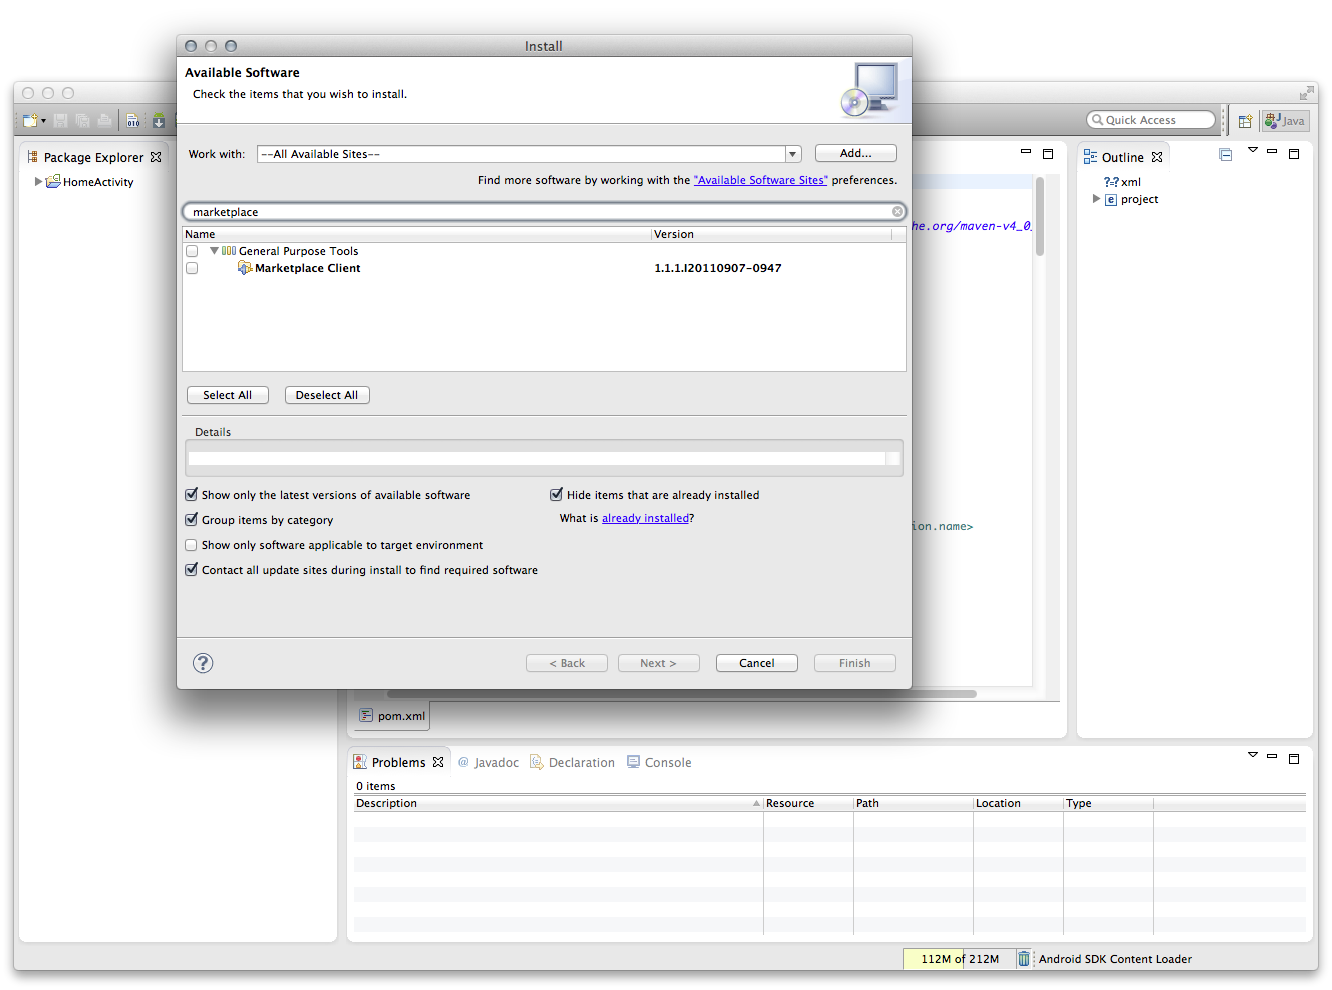
Go to Help > Install new software
Choose "All Available Sites"
Select "MarketPlace Client" under General Purpose Tools
Also select "Eclipse Egit "
Click Next, Accept the License and Finish.
Accept to Restart.
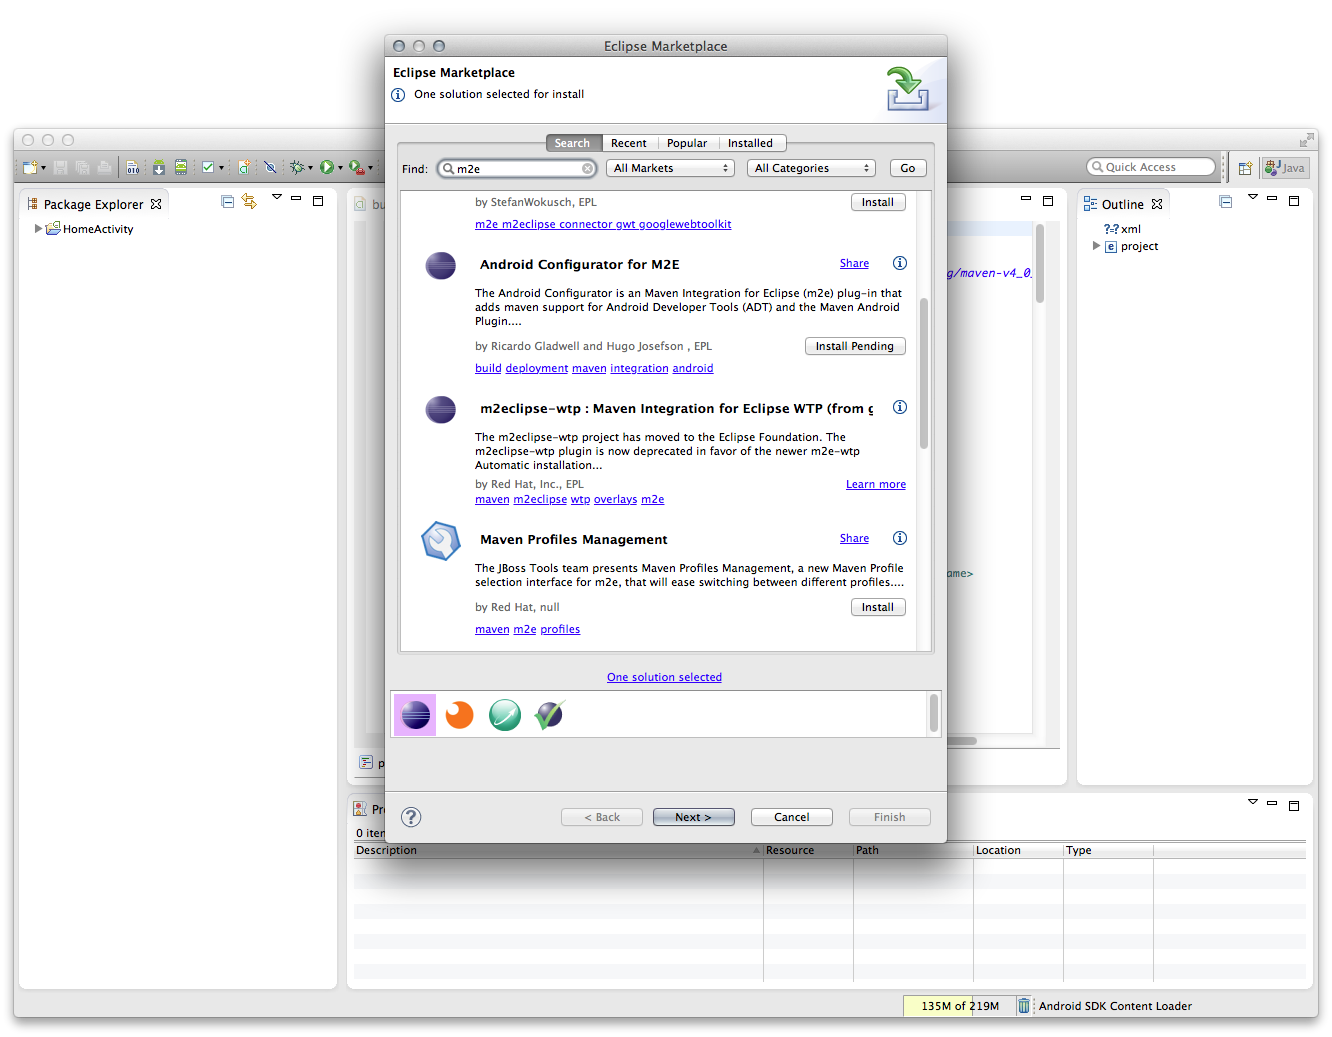
Go to Help > Eclipse MarketPlace
Find "Android Configurator for M2E"
Click Next, Accept the License and Finish.
- Clone the repository
cd ~/workspace
git clone https://github.com/TeamPanicButton/PanicButton.git
- Import the project.
Go to File > Import
Select Maven > Import Maven Project
Locate the git folder you've cloned.
Accept the proposed Maven Plugins (resolve later is fine).
Once the project is open you should have some errors in the Problem window.
Choose the Quick Fix for the comsumer-aar related error and choose to
Upgrade to maven 3.1.1
http://maven.apache.org/download.cgi
or
brew install maven
Then change the version of maven used in Eclipse:
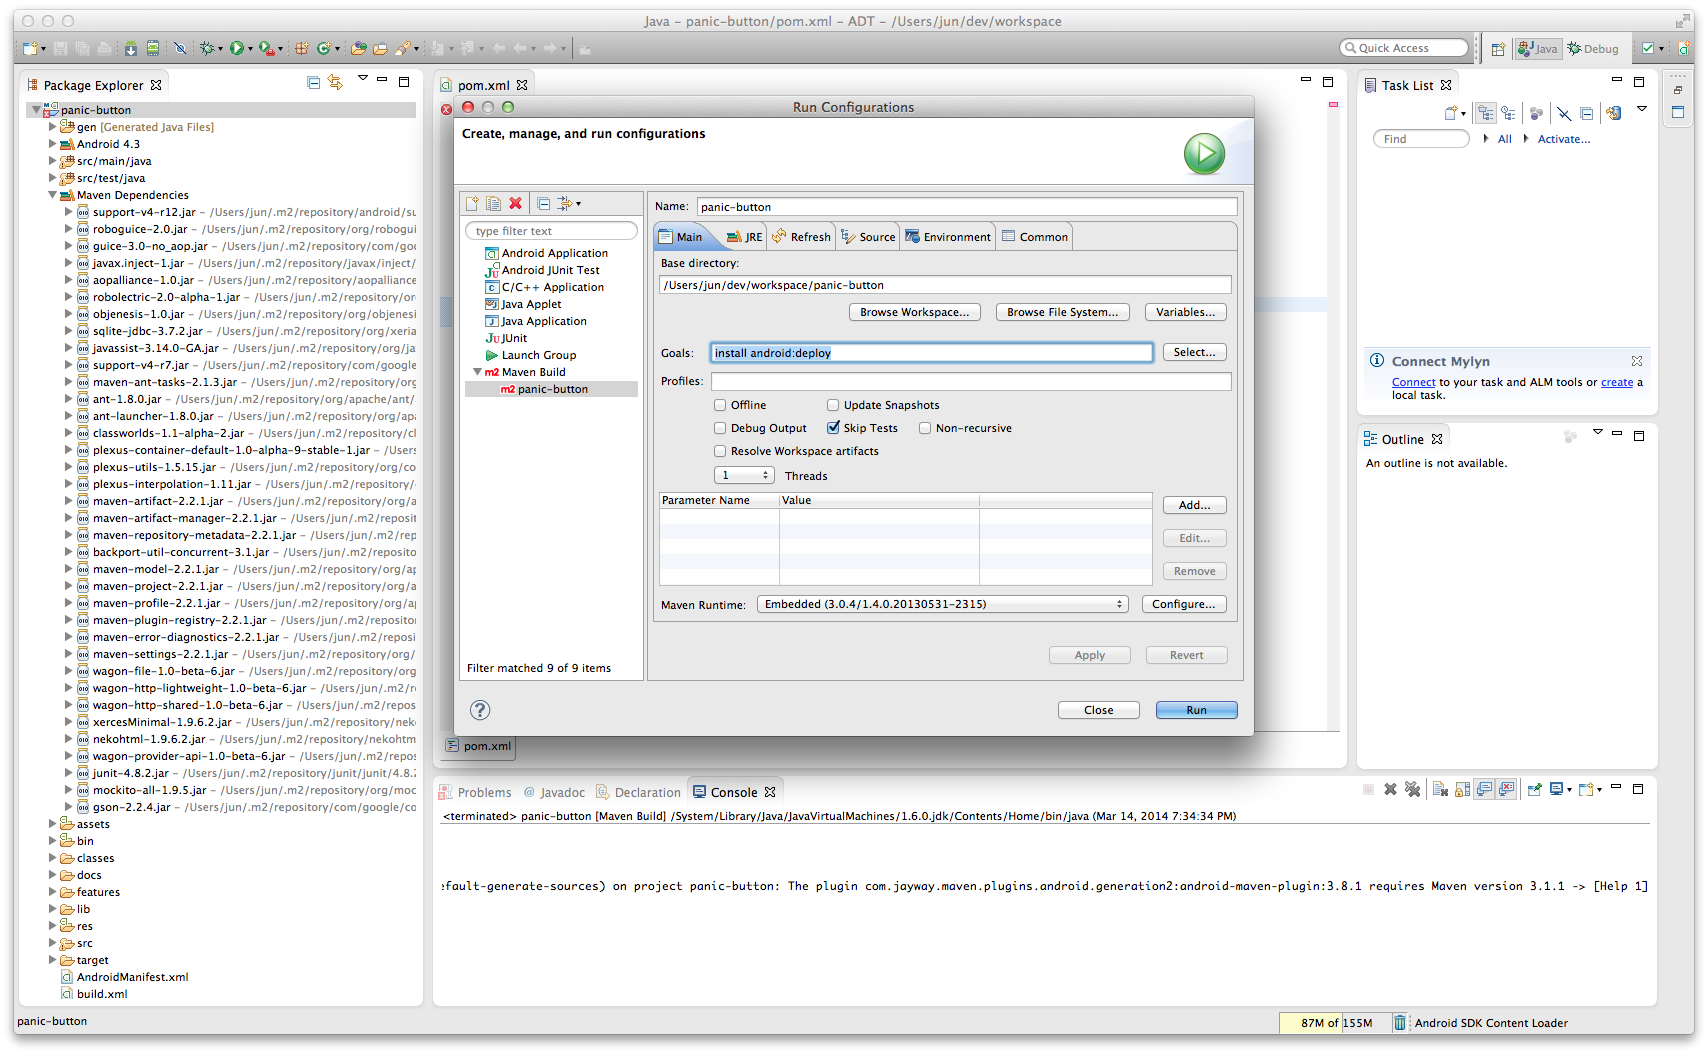
Go to Run > Run configurations
At the bottom right (Maven Runtime) choose "Configure..."
Navigate to /usr/local/Cellar/maven/3.1.1/libexec
Yes that's right. No copy and pasting the path on OSX... Still here? Wishing you'd helped us move to Gradle instead yet?
Last step.
In Run Configurations:
In "Goal" add the "install" goal. (Optionally if you've setup the Android Emulator you can add "android:deploy")
Add the "android.sdk.path" variable in your Maven Run configuration and set it to the sdk path (which is in a sister folder to Eclipse.app). for instance /Applications/adt-bundle-mac-x86_64-20131030/sdk/
Ok one more.
Build even if coverage tests fail set "failBuildIfCoverage" to false.
Now go ahead and Go to Project > Run > Maven build. There you go an APK !


