👍🎉 First off all, thanks for taking the time to contribute! 🎉👍
The following is a set of guidelines for contributing to Upcode ShopFront, which are hosted in the Upcode Organization on GitHub. These are mostly guidelines, not rules. Use your best judgment, and feel free to propose changes to this document in a pull request.
What should I know before I get started?
This project and everyone participating in it is governed by the Upcode code of Conduct. By participating, you are expected to uphold this code. Please report unacceptable behavior to [email protected].
When we make a significant decision in how we maintain the project and what we can or cannot support, we will document it here.
This section guides you through submitting a bug report for ShopFront. Following these guidelines helps maintainers and the community understand your report 📝, reproduce the behavior 💻 💻, and find related reports 🔎.
Before creating bug reports, please check issues list as you might find out that you don't need to create one. When you are creating a bug report, please include as many details as possible.
Note: If you find a Closed issue that seems like it is the same thing that you're experiencing, open a new issue and include a link to the original issue in the body of your new one.
Unsure where to begin contributing to ShopFront? You can start by looking through these beginner and help-wanted issues:
- [Beginner issues][beginner] - issues which should only require a few lines of code, and a test or two.
- [Help wanted issues][help-wanted] - issues which should be a bit more involved than
beginnerissues.
Both issue lists are sorted by total number of comments. While not perfect, number of comments is a reasonable proxy for impact a given change will have.
You will need to use the environment variables defined in .env.example to run Next.js Commerce. It's recommended you use Vercel Environment Variables for this, but a .env file is all that is necessary.
Note: You should not commit your
.envfile or it will expose secrets that will allow others to control your Shopify store.
- Install Vercel CLI:
npm i -g vercel - Link local instance with Vercel and GitHub accounts (creates
.verceldirectory):vercel link - Download your environment variables:
vercel env pull - Install pnpm (https://pnpm.io/installation) :
curl -fsSL https://get.pnpm.io/install.sh | sh -
pnpm install
pnpm dev
Your app should now be running on localhost:3000.
-
If you are new to Git and GitHub, it is advisable that you go through GitHub For Beginners before moving to Step 2.
-
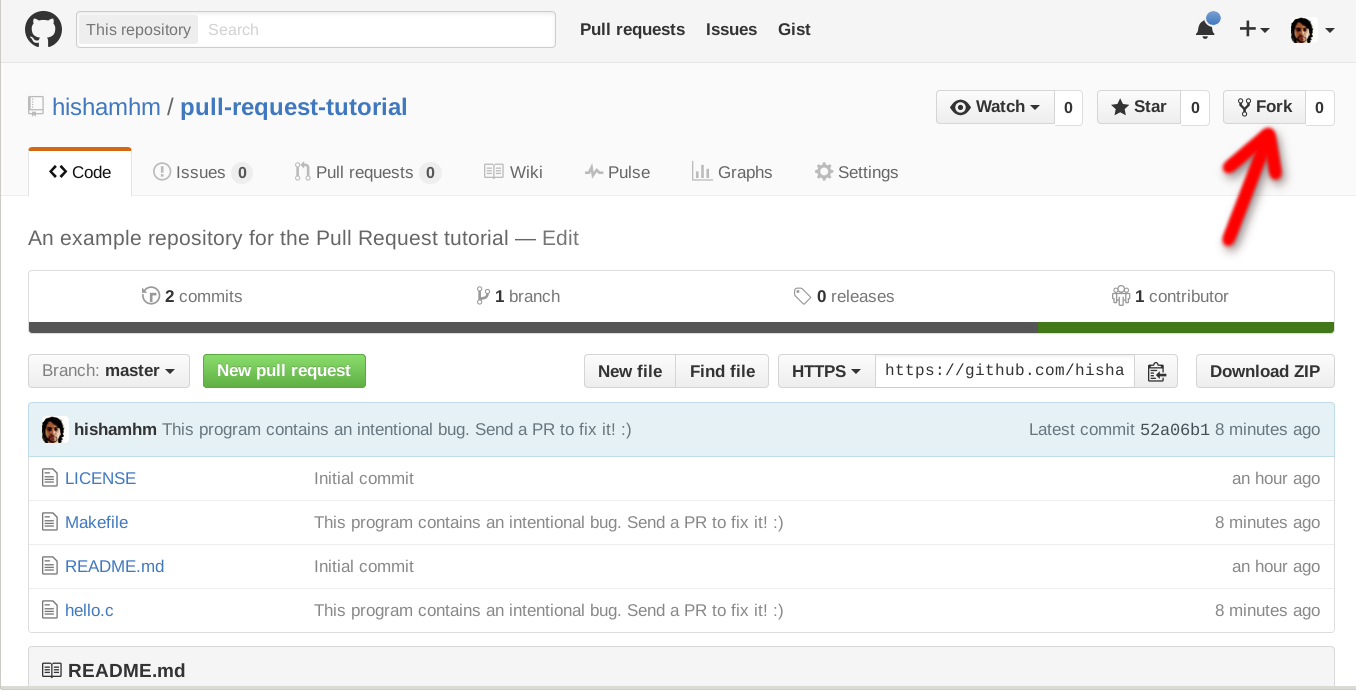
Fork the project on GitHub. Help Guide to Fork a Repository.
-
Clone the project. Help Guide to Clone a Repository
-
Create a branch specific to the issue you are working on.
git checkout -b update-readme-file
For clarity, name your branch
update-xxxorfix-xxx. Thexxxis a short description of the changes you're making. Examples includeupdate-readmeorfix-typo-on-contribution-md. -
Open up the project in your favorite text editor, select the file you want to contribute to, and make your changes.
If you are making changes to the
README.mdfile, you would need to have Markdown knowledge. Visit here to read about GitHub Markdown and here to practice. -
Add your modified files to Git, How to Add, Commit, Push, and Go.
git add path/to/filename.ext
You can also add all unstaged files using:
git add .Note: using a
git add .will automatically add all files. You can do agit statusto see your changes, but do it beforegit add. -
Commit your changes using a descriptive commit message.
git commit -m "Brief Description of Commit" -
Push your commits to your GitHub Fork:
git push -u origin branch-name
-
Submit a pull request.
Within GitHub, visit this main repository and you should see a banner suggesting that you make a pull request. While you're writing up the pull request, you can add
Closes #XXXin the message body where#XXXis the issue you're fixing. Therefore, an example would beCloses #42would close issue#42.
If you decide to fix an issue, it's advisable to check the comment thread to see if there's somebody already working on a fix. If no one is working on it, kindly leave a comment stating that you intend to work on it. By doing that, other people don't accidentally duplicate your effort.
In a situation where somebody decides to fix an issue but doesn't follow up for a particular period of time, say 2-3 weeks, it's acceptable to still pick up the issue but make sure that you leave a comment.
The process described here has several goals:
- Maintain ShopFront's quality
- Fix problems that are important to users
- Engage the community in working toward the best possible ShopFront
- Enable a sustainable system for ShopFront's maintainers to review contributions
Please follow these steps to have your contribution considered by the maintainers:
- Follow the styleguides
- After you submit your pull request, verify that all status checks are passing
What if the status checks are failing?
If a status check is failing, and you believe that the failure is unrelated to your change, please leave a comment on the pull request explaining why you believe the failure is unrelated. A maintainer will re-run the status check for you. If we conclude that the failure was a false positive, then we will open an issue to track that problem with our status check suite.
While the prerequisites above must be satisfied prior to having your pull request reviewed, the reviewer(s) may ask you to complete additional design work, tests, or other changes before your pull request can be ultimately accepted.
- Use the present tense ("Add feature" not "Added feature")
- Use the imperative mood ("Move cursor to..." not "Moves cursor to...")
- Limit the first line to 72 characters or less
- Reference issues and pull requests liberally after the first line
- Consider starting the commit message with an applicable emoji:
- 🎨
:art:when improving the format/structure of the code - 🐎
:racehorse:when improving performance - 🚱
:non-potable_water:when plugging memory leaks - 📝
:memo:when writing docs - 🐛
:bug:when fixing a bug - 🔥
:fire:when removing code or files - 💚
:green_heart:when fixing the CI build - ✅
:white_check_mark:when adding tests - 🔒
:lock:when dealing with security - ⬆️
:arrow_up:when upgrading dependencies - ⬇️
:arrow_down:when downgrading dependencies - 👕
:shirt:when removing linter warnings
- 🎨
All JavaScript code is linted with Prettier.
-
Prefer the object spread operator (
{...anotherObj}) toObject.assign() -
Inline
exports with expressions whenever possible// Use this: export default class ClassName { } // Instead of: class ClassName { } export default ClassName