In this tutorial page we aim to share with you some resources on how to get started with Git basics so that you can begin working with repositories and contributing however you can to this large community of like-minded developers, and hopefully also to this repository.
To begin, let us take a look at some articles that will help you learn about Git and gain the confidence to begin to work with repositories for yourself!
To get started with git first you must install it, to do so visit this link and select the download that is applicable for your Operating System.
You can check to see that you have git installed on your machine by opening the command line and entering the command git -v which should return the version of git that you have just installed.
Once you have git installed you are ready to start using it to create repositories and handle your version control. There is a lot of ground to cover with Git and Git commands so instead of doing it all here I will link to a video by Kunal Kushwaha that does a very good job explaining everything in depth.
Here is also an added link to a cheat sheet that is nice to use for common commands in case you get stuck a lot when you are just starting out: https://www.atlassian.com/git/tutorials/atlassian-git-cheatsheet
In case you are just looking for some of the more commonly used commands, here are some very common ones to refresh your memory:
| Git Command | Result |
|---|---|
| git init | Create a local git repository for your project. |
| git checkout -b | This will create a new branch and switch to it. This is good practice when working on a new issue so that you can keep new code seperate from the old until you are confident in it. |
| git add <filenames> | This command adds the specified files from your project to the staging area, if you want to add everything instead of a file you can type a single period such as '.' |
| git status | This command will show you the status of all of the files in your project, it will show you which files are being tracked, which files are modified, which files are added for commit and is very useful to keep track of what you are working with. |
| git commit -m | This command takes the files you have added to staging and prepares them to be sent to a remote repository. |
| git push origin master | This will take the commited changes and send them to the remote repository in git hub, this will over write the information on the master branch with the changes that you have commited. |
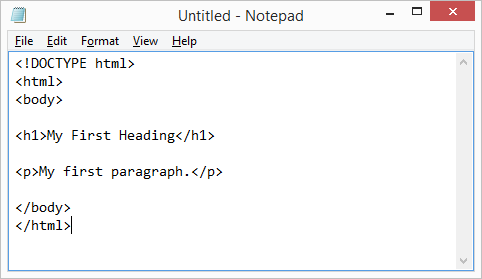
HTML stands for Hypertext Mark Up Language and in simplest terms is the series of elements denoted by tags such as <b></b> for Bold that make up the document that you can see in the browser. These tags are often pretty self explanatory <paragraph> for example will denote the start of a paragraph, alternatively the short form <p> will do the same thing.
A great resource to learn the fundamentals of HTML is W3 Schools and if you are looking for a long format YouTube video that goes into depth about the foundations of HTML including images, hyperlinks and more then this Programming with Mosh video is a great watch.
CSS stands for Cascading Style Sheets and they are what gives style to the HTML elements. The presentation of a piece of software is very important to the end user experience and it is often dictated by the CSS, but have no fear getting started is easy (mastering it is altogether different). Just like with HTML othere are some great resources on the web to help you start writing your first CSS, among them are Mozilla's intorductory guide and once again our friends at W3 Schools.
As for an intro to CSS video Web Dev Simplified has a great video to show you the basics.
Tailwind is the newest and most exciting piece to the puzzle so far. It is a CSS framework that takes some of the utility of the most useful CSS classes and lets you use them very easily. Whenever you are creating an HTML element you can specify much of the style and behavior by passing a whole host of classes directly into the class attribute of your HTML, this means that you can quickly and efficiently style each element. Tailwind is also very efficient on size, removing unused classes automatically.
Here is a link to the Tailwind Documentation, starting with a page that shows the difference between traditional HTML and CSS and the use of Tailwind.
If you are interested here is the Tailwind Git.
Here is a video to introduce you to Tailwind and to get you started with one of the most convenient CSS frameworks around!


